
| << previous | home | next >> |
"Don't be too proud of this technological terror you've constructed"
-- Darth Vader, a long time ago, a galaxy far far away.
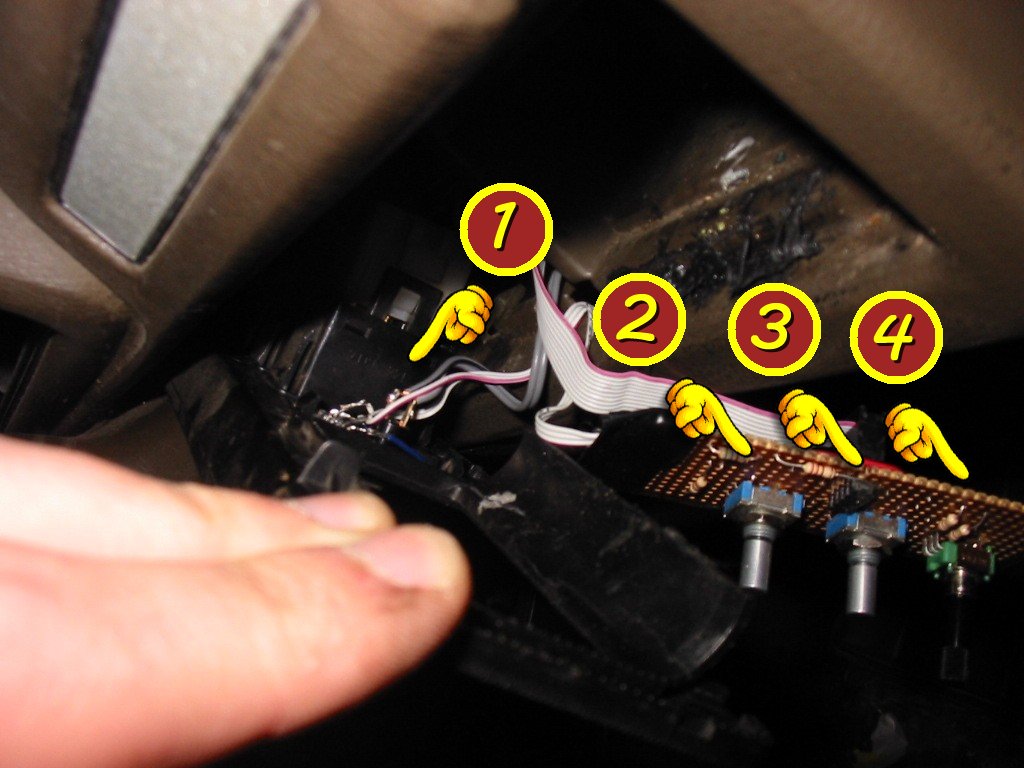
Shown below is the entire user interface for the computer system. Don't be fooled by the apparent simplicity of it. Those three little knobs pack in an impressive amount of functionality. This photo was taken as Pete was extracting the system out of my car. Pete is baby-sitting my system while I am in London.
|
| The Control System (800x600, 1024x768, No Numbers) |
What? No screen?
Truth be told, the reason I didn't include a screen was actually the time-frame I had to build this thing. Basically, right before New Years 2002 I had 5 spare days left before I did a road-trip around Nelson. I had spent so long working on this project that I *HAD* to have it running before this trip. In these 5 days I had to build the interface, program the computer and program the two microcontrollers (slow!! -- the only feedback for debugging was flashing LEDs! Compiler bugs didn't help matters either!) I.E. not much time.
So building a LED screen wasn't going to fit the time frame. I wanted to have voice in there somewhere, but it soon became the entire feed-back for the User Interface. In hind-sight, the voice feedback system is far superior. It is dead-simple to use once you know it, and you never have to look away from the road to find out what's going on.
Every goes "Wow! your car talks!" Hee hee, I guess everyone kit wanted a Kitt from Knight Rider back in the day. But where the user action is obvious, the stereo simply beeps, rather than saying something... We don't want it to be too tacky!
The voice only took about a day to implement, using an old free version of microsoft text-to-speech. Which is funny because by comparison, no one is as impressed by the PCBs which took place over a year's spare hours, spent locked away learning how to design switch-mode Power Supplies and to lay out PCBs. :-)
The mode of operation is selected by turning knob 3. The four modes; 'MP3', 'EQ', 'GPS', 'Speed', work as follows.
| State | Knob 2 | Action |
|---|---|---|
| While Stopped | Press + Release | Play current song |
| Turn left or right | Skip forward or back 1 song. Speak the Track Name | |
| Press in and turn | Skip forward or back an album. Speak the Album Name | |
| While Playing | Press + Release | Stop Playing |
| Turn left or right | Skip forward or back 1 song. Speak the Track Name | |
| Press in and turn | Jump forward or back 5 seconds within the song |
In MP3 mode, Knob 3 also doubles as a pause button when it is pressed.
This mode will control Winamp's 10-band Equaliser. (Yes, it's just Winamp in there doing the grunt work, being controlled by a piece of software I wrote).
| Knob 2 | Action |
|---|---|
| Press in and turn | Rotate through bands: Pre-amp, 60Hz, 170Hz, 330Hz ... 16kHz. The selected Frequency is Spoken |
| Turn left or right | Raise or lower the selected frequency band. Three different beeps are used to indicate when the top/bottom or mid-points have been hit |
| Press + Release twice | Reset E.Q. to Flat |
Due to the short development time-frame, there is still no real way of inputting new coordinates into the GPS system. I simply hard-coded 8 way-points for my trip around Nelson.
| Knob 2 | Action |
|---|---|
| Turn | Rotate through hard-coded waypoints. E.G. 'Home', 'Hanmer Turnoff'... |
| Press + Release | Get a position reading, for example: "You are 24 kilometers from Springs Juction. Bearing 35 degrees" |
Note that the position reading was a bit of an approximation. I did not have any software that would transform lat/long coordinates into the NewZealand Map Grid system to give me true kilometers. (Trimble Pathfinder Tools would have been ideal! --shameless plug)
While there are not enough satellites acquired (4 required), the GPS status will be announced. E.g. "2 satellites", or "Position Locked"
Get a reading of the current velocity.
| Knob 2 | Action |
|---|---|
| Press + Release | Get a velocity reading, for example: "You are travelling at 94 kilometers per hour. Heading 12 degrees" |
The speed is also determined by the GPS receiver.
| << previous | home | next >> |